Well, let’s face it: there are plenty of DIY maintenance tasks you can sink your teeth into when it comes to camper trailers. While I wouldn’t say getting your hands dirty in the shed is exciting stuff, there’s definitely a sense of satisfaction that comes with showing your camper trailer a bit of lovin’, especially after a few big trips away.
But where do you start? For me, the mechanical side of things usually rates as the highest priority, but if you’re not all that handy on the tools why not get stuck into a bit of canvas maintenance, or some odds and ends to help your camper sparkle for longer?
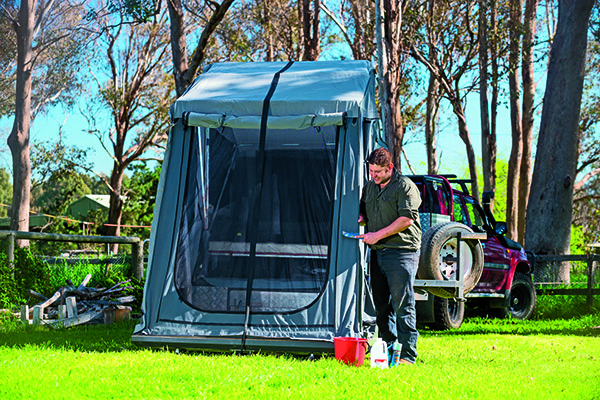
We take a look at some of the tricks and tips you can use to extend the life of your camper trailer’s tent, along with a few fixer-uppers I’ve managed to hook into my Ezytrail camper, which I scored for a good price after it had been left out in the weather for God knows how long.


So grab a cupper, whack your feet up and read on…
1. THE QUICK HOSE DOWN
One of the best ways to keep your canvas looking good and free of odours – and believe it or not waterproof – is to wet it down regularly with the garden hose. The idea is it keeps any dirt, tree sap, bird droppings and other debris from becoming ingrained into the canvas, which can end up causing irreversible damage. I typically try and do this at least twice a year if possible to keep on top of things.
To avoid damaging the fabric steer clear of soap, detergent or solvents to remove stains or marks though – a clean cloth or medium brush combined with either cold or lukewarm water should be enough to remove a build up of dust or dirt.
Oh yeah, I mentioned earlier it keeps the tent water tight too didn’t I? You see the idea is water and humidity can cause the fibres to swell up and seal any gaps or holes in the canvas’ weave. How’s that for cheap waterproofing, eh?
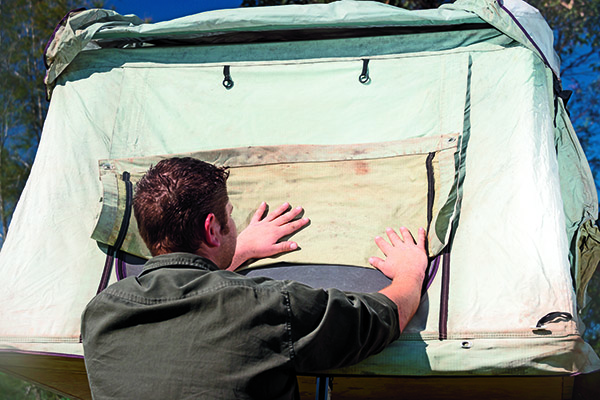
2. TACKLING MOULD
Everybody’s got an opinion on treating mould building up on canvas, and there is definitely not shortage of products available off the shelf to help sort the problem either. Like most things in life, I’ve found there’s plenty of simple, easy and most of all, cost effective tricks that can rescue your canvas. First thing to do is open the tent up in direct sunlight, which is one of the most effective ways to kill mould.
That’s right, you don’t need fancy chemicals to kill it, just air it out in direct, full sun. Let it dry the mould out, then simply brush it off with a hard bristle brush or run a vacuum over it to get rid of the remaining spores.
Now as I mentioned earlier there are a heap of products available to remove mould, but most of these will also damage or remove your canvas’ waterproofing and/or sun protection agent at the same time. A much less invasive method is to mix white vinegar with water, spray it on and scrub it with a bit of cloth or hard bristle brush. Around 20-50ml per litre of water should do the trick! I’ve heard of some people using a mixture of lemon juice and water as well, but in my experience it just hasn’t worked.
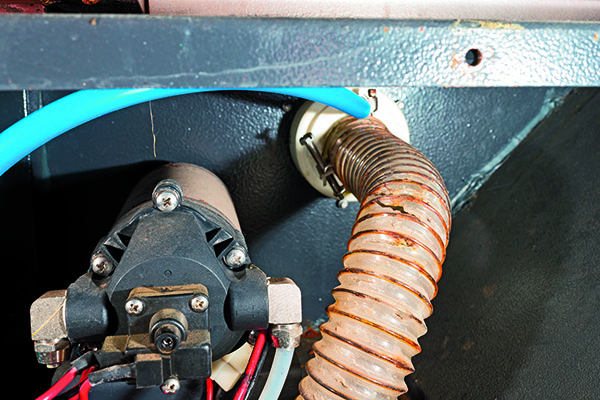
3. STOP LEAK, TAKE TWO
You might remember a few issues back I was chasing a water leak at the rear of the camper trailer. To be honest, I thought I found the problem after fixing a few dust seals that looked a bit frail. But a few days later I set off on another trip and when I opened up the camper low and behold it was full of water ...again.
So, after throwing a few spanners around the place and digging a little deeper, I think I’ve got to the bottom of this dilemma. Yep, it turns out the water tank’s filler tube has seen better days. So while I’m filling up the water tank with some good old H2O, I’ve also been filling up the back half of the camper trailer too. Thankfully it’s not a hard thing to fix, but by crickey, I’m glad to finally solve the mystery!
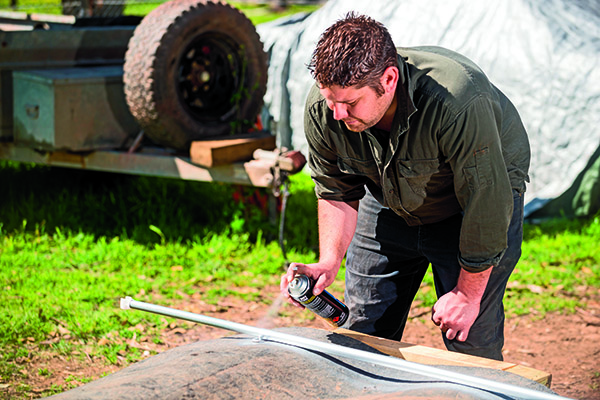
4. THE ONSET OF CORROSION
Now that the water leak has been found it’s time to start repairing the damage the moisture has caused. It’s the little things that make a big difference too, like swapping out any rusted mounting screws with stainless steel replacements.
The tent’s poles have started to suffer the initial stages of corrosion, with the threads on the locking screws binding up. These are replaceable but I figure a can of WD-40 will sort the men out from the boys here. A quick rub down with sand paper or Scotch-Brite is enough to ward off the early signs of corrosion, while a coat of Rust Guard, or something similar will help to keep the red manace at bay.