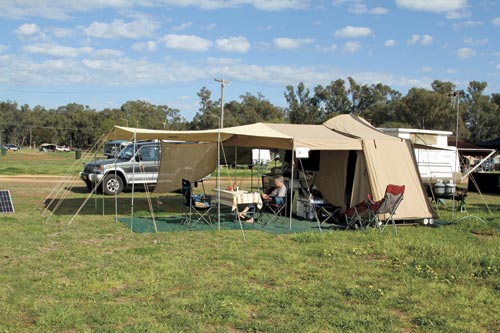
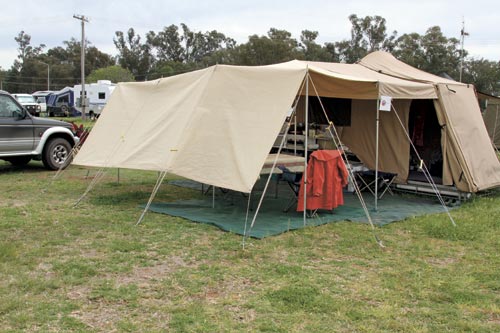
We all camp for our own reasons. For some it's the peace of sharing a campfire with your significant other, watching the velvet night sky arch above as a dingo cries in the distance. For others it's the perfect way to get away with a bunch of friends, sharing stories around the fire and enjoying communal meals.
If you are of the latter gregarious group who love to have your friends around, how do you provide that central gathering point in the shade and without posing too much weight and bulk in transport?
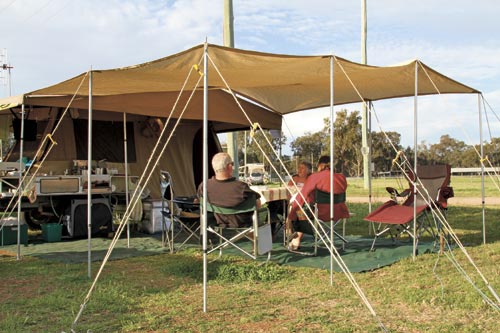
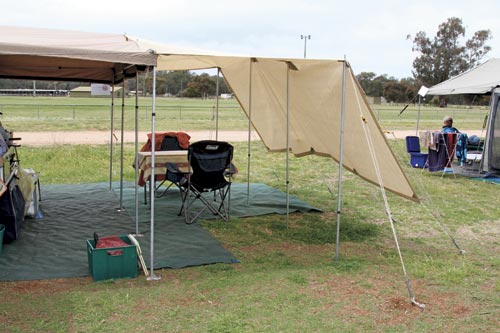
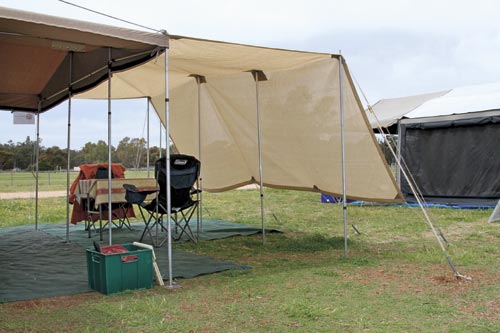
The answer could be a shadecloth extension to your trailer's awning. With the right help, you can put one together relatively easily without breaking the bank. Since it's shadecloth it's designed for outdoor exposure so it can travel on top of your camper and is light enough for two people to erect.


MEASURING YOUR AWNING
The easiest way to make a shadecloth cover for your campsite is to use your awning's existing dimensions and support structure.
To do this, measure the top edge of the awning taking note of the space between each eyelet, where each pole goes. It is important to measure these distances carefully, as support poles are rarely evenly spaced. Our awning uses four support poles that span its width; yours may use less or more.
Once you have these dimensions map out a plan, mirroring the distances between each eyelet, and adding 6.5 cm either side for the seams. The depth of the cover will depend on the size of the shadecloth you chose.
SELECTING THE SHADECLOTH
Shadecloth is readily available. Our local hardware outlet had it in a range of grades and colours in a choice of two widths. We chose the heaviest grade for maximised shade and superior strength and the widest stock at 3.66 m, which influenced the depth of our cover. The wheat coloured cloth matched our canvas the best - I suggest that you opt for a light colour so that the sun is reflected rather than absorbed.
Commercial-grade shadecloth is available elsewhere if you are willing to pay more. You can usually save some money purchasing it online.
Once you know the width of your cover, you can introduce to your plan a centre line of eyelets parallel to your awning supports so that you can convert your shade into a sun room.
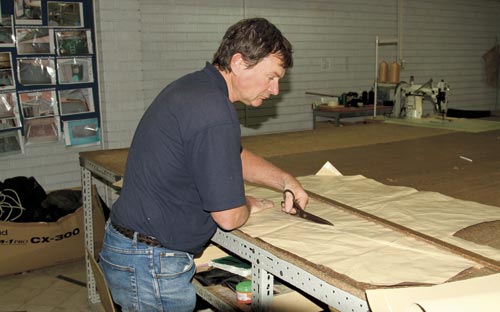
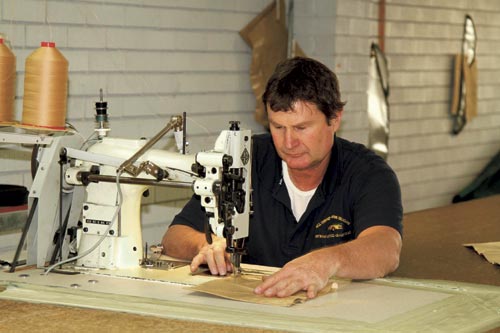
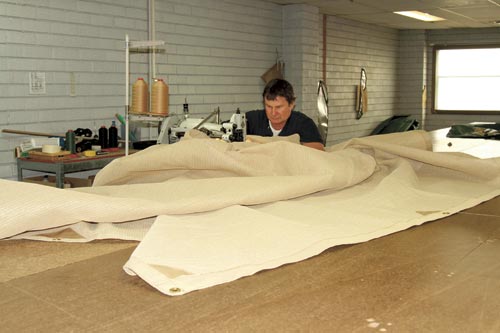
OUTSOURCING THE SEWING
We took our plan and shadecloth to All Terrain Campers, which is close to our home in Sydney. All Terrain has its own canvas sewing facility and was willing to undertake our order. It's worth phoning your nearest camper trailer manufacturer before you commence to see if they will do the same for you.
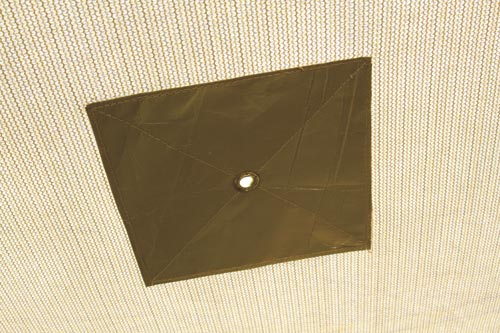
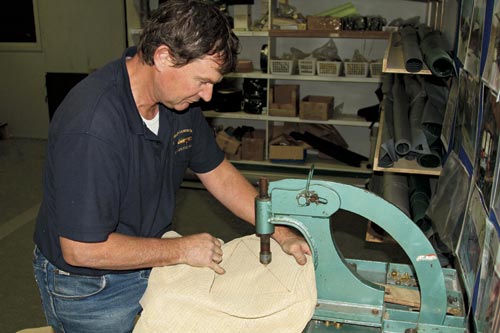
All Terrain sewed a double-folded hem around the cloth's perimeter, reducing the shadecloth's width to 3.4 m. This provided enough strength to support the eyelets. One of All Terrain's canvas workers Greg Kay - a qualified sailmaker - added reinforcing patches around each eyelet to spread the load. We hadn't factored this into our plan, but it has made a huge difference to the final product.
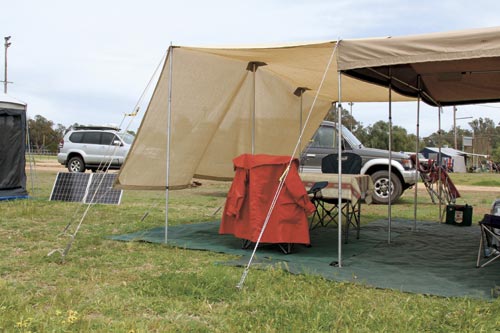
SECURING YOUR SHADE
It's now time to think about supporting your structure. Tent poles will suffice around the outer edges. We had enough spare to do the job, as well as spare ropes and pegs to handle the task.
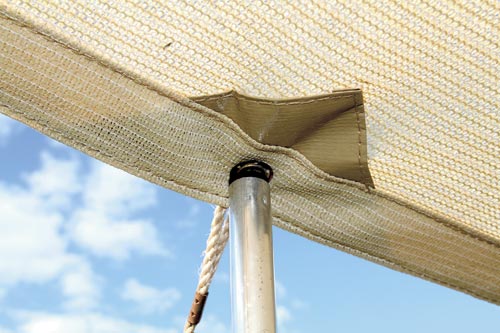
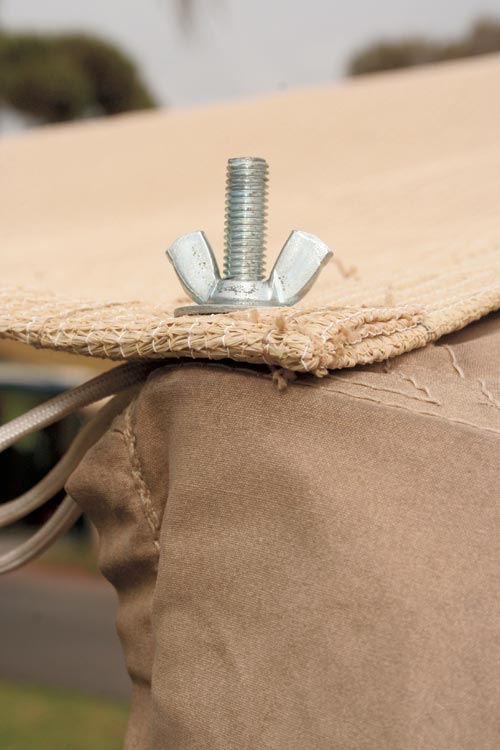
To prevent your shadecloth from lifting off the pole spikes along camper's awning in windy conditions, replace your pole spikes with some that have thread. Threaded spikes are available at camping stores and are usually sold with wing nuts. If you can't find them search online for threaded tent pole sigpots.
A large washer under each of the wing nut will prevent the shadecloth and awning canvas from lifting off the poles in windy conditions.
CONSTRUCTING THE BASE PLATES
The shadecloth will add a new load your awning's support poles,so base plates will anchor them into the ground.
A friend of mine who is a metal fabricator gave us four pieces of 5 mm checkerplate aluminium cut to 12x10 cm to create the bases.It shouldn't cost much to source something similar.
Cut 6 cm lengths of internal-extension pole for each support so that your poles will slot securely over the top of them.
Drill a hole at each corner on one side of the plate. This will form the front of the base plate. The holes should be large enough to accommodate two heavy-duty tent pegs so that you can peg the base plates into the ground.
HOLING THE POLES
Next you'll need to drill holes for the R-clips, which will secure the poles to the base plates at camp. Each tube and pole will need a hole on both sides so that the clip pin can pass through the centre to the other side.
Measure and mark the holes 3 cm from the top of the tube, and 3 cm from the bottom of your awning poles, taking care to follow the diameter of your tubes and poles. Ensure the drill bit is large enough for the clip pin and drill with care. If you are accurate in your measurements each pole will slot easily over each base plate,saving you time pairing the poles and plates at camp.
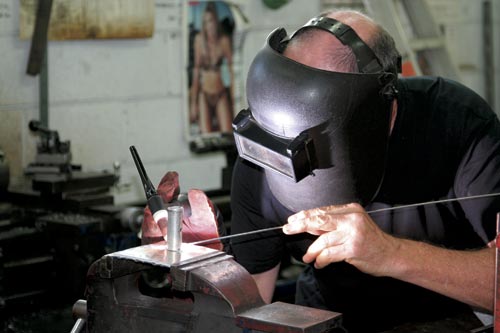
WELDING THE TUBES
I recommend commissioning a welder to attach the tube lengths onto the plates. Offset the tubes from the centre away from the base plate holes. These welds are tricky, since the tube is thin compared to the plate. It is important to equalise the heat between the two surfaces before welding. It cost us $20 for the welds.
Finally, round the corners of the plates and drill a hole through each base beneath the tube so that rainwater can drain. Voila, your shadecloth shelter is complete. Ours worked just as planned the very first time, giving us nearly 15 m2 of shady retreat.
Shadecloth won't shelter you from the rain, but if you attach eyelets to a tarp working from the same dimensions on your shadecloth plan, you can throw it over the top - we've done it and it works a treat.
SHADE SAIL DIY AWNING
Project cost
> Heavy-duty 3.66 m - wide shadecloth, 4.5 m @ $26.40 per metre - $118.80
> 4R-clips - $4.40
> Threaded tent pole sigpots (pole spikes), 4 @ $3.50 ea - $14
> Hemming, sewing and 12 pole eyelets - $150
> Welding four tent bases to plates - $20
TOTAL: $307.20
We also used
> Tent pole extension tube (sized to fit inside your awning's poles)
> 12x10 cm checkerplate aluminium for each awning pole
> Extra tent poles and heavy-duty tent pegs
Tools
> Drill, hacksaw, round and flat files, tape measure
Difficulty
> Easy