Although the modern day fridge/freezer has brought Helgas and Tip-Top into the domain of the bush, the old time Aussies who pioneered damper certainly didn’t have access to such luxuries. In those times they got around on horseback and, needless to say, the wily broncos they saddled would have kicked their teeth in had they attempted to install an Engel.
Instead, for their nourishment, they carried around basic, durable ingredients: flour, sugar, salt and some sort of fat, be that butter or oil. Come night, crouching on hams stiff from a day’s riding, they’d dig a pit, gather a few sticks and kick up a small blaze. Around them, the dust would settle, the darkness fall and the owls commence to hoot.
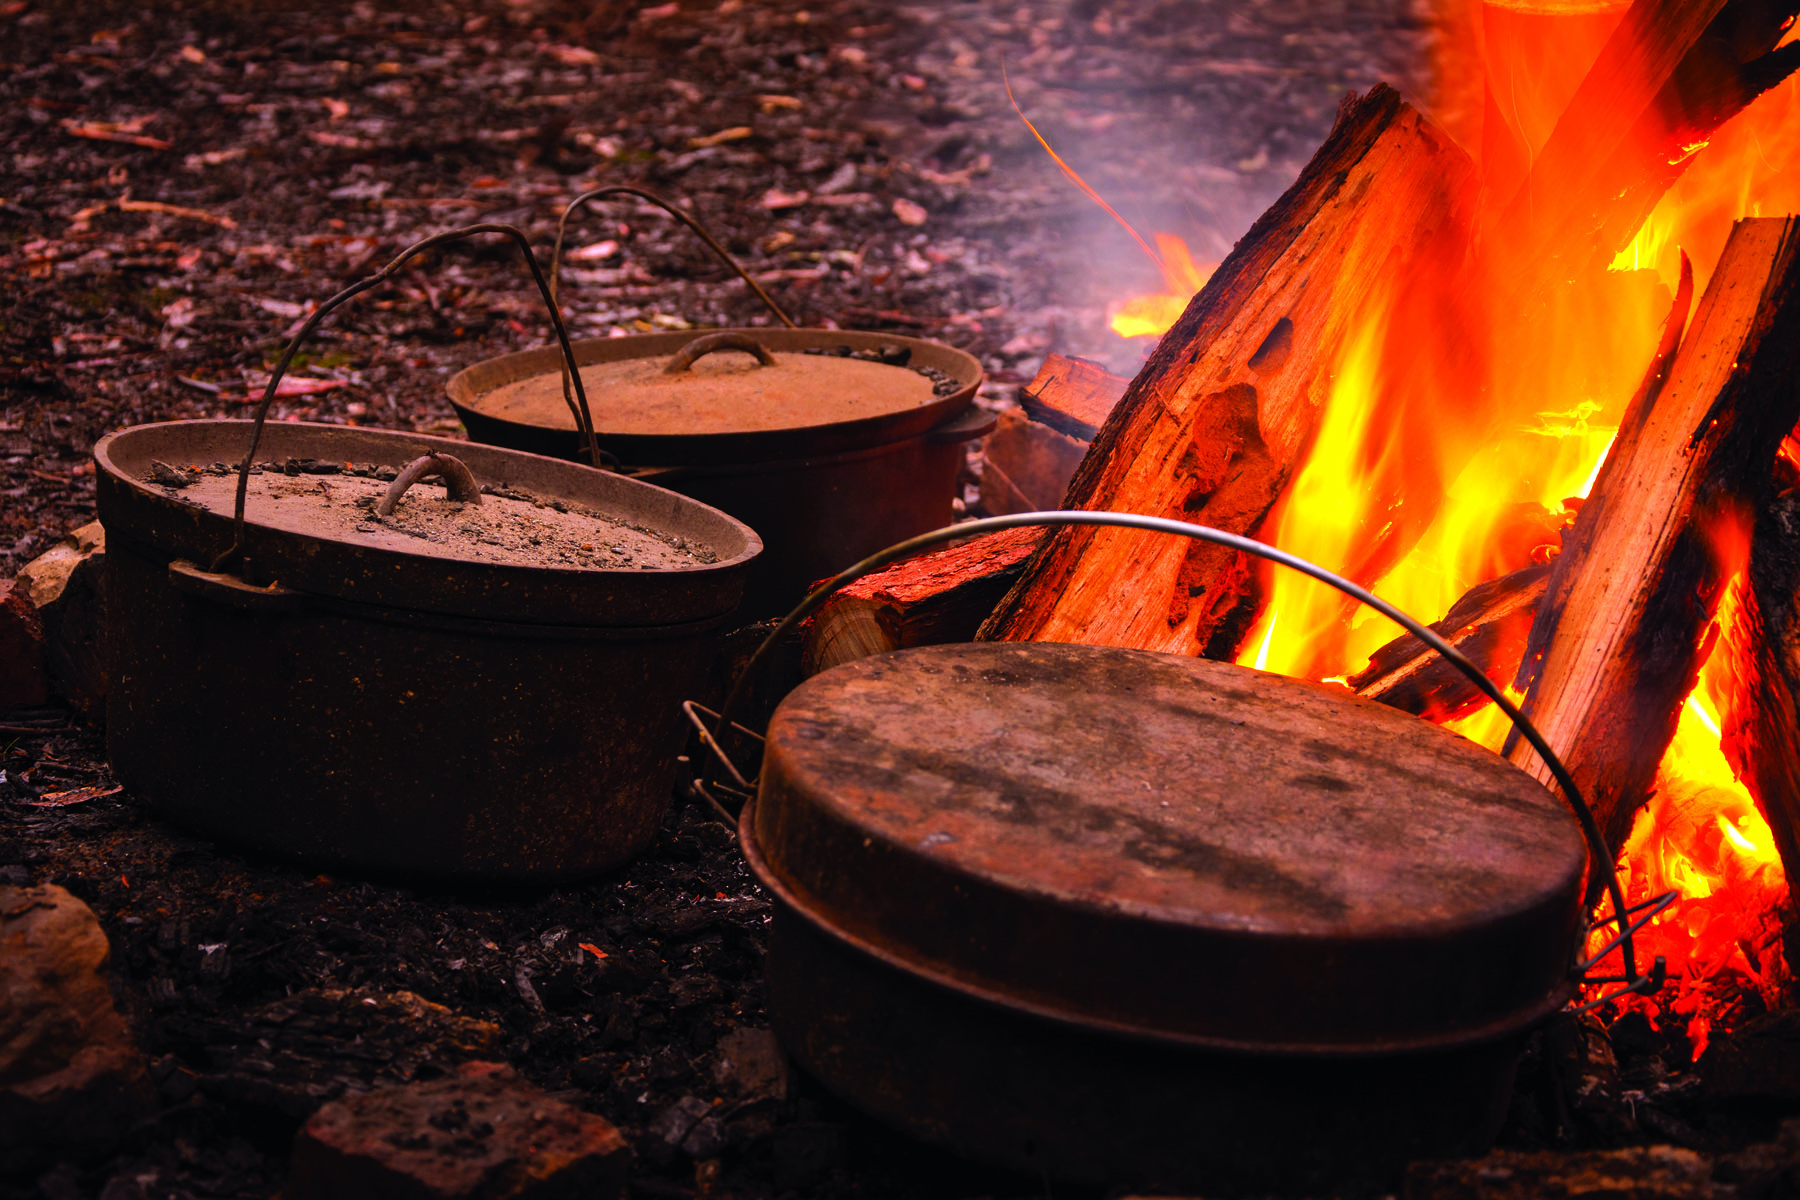
From their pack they’d take a lightweight, rusted camp oven, in which they’d mix together their few ingredients before placing the oven over hot coals. The orange glow would flicker over their weathered faces, revealing deep furrows between the brow, but smile lines too, and as the bread slowly rose, they’d contemplate the harsh terrain they’d covered and the beastly terrain to come.


Images by Getty Images/ OnPatrol Photography & Getty Images/MillefloreImages
Bottom line, we’re all a bunch of softies nowadays. Not only did these folks’ mode of transport lack fridge/freezers; their horses lacked mud terrains and queen sized innerspring mattresses, and the only suspension to speak of was the rider’s lumbar spine.
The least we can do then is to pay some respect to the hard-nuts that we have to thank for outback folklore and, to a large extent, the Australia we know today. What better way to do that than by baking a damper?
Cook time: 40 minutes
Serves: Four
Ingredients:
- Small camp oven
- 3 cups of plain flour
- Bi-carbonate soda
- Alternatively to above, 3 cups of self-raising flour
- Salt and sugar
- Butter
- 250mL milk
- Bacon & herbs, or dried fruit & syrup (optional)
Add the plain flour, five teaspoons of bicarbonate soda and a few generous pinches of salt and sugar to a bowl. Alternatively, use self-raising flour instead of plain and bicarbonate soda. Stir whatever dry content you’ve put in the bowl thoroughly.
Next, add in the milk (and some butter if you wish) and mix with a wooden spoon or your God-given hands until the whole lot is of an even consistency. The amount of milk is flexible (you can put in more or less), just ensure there is enough such that the damper doesn’t stick to the sides of the pot, but not so much the lactose intolerant in your midst hold a grudge for weeks to come. You can use water instead of milk or go full bushie and use milk powder (creating the liquid content using water instead).
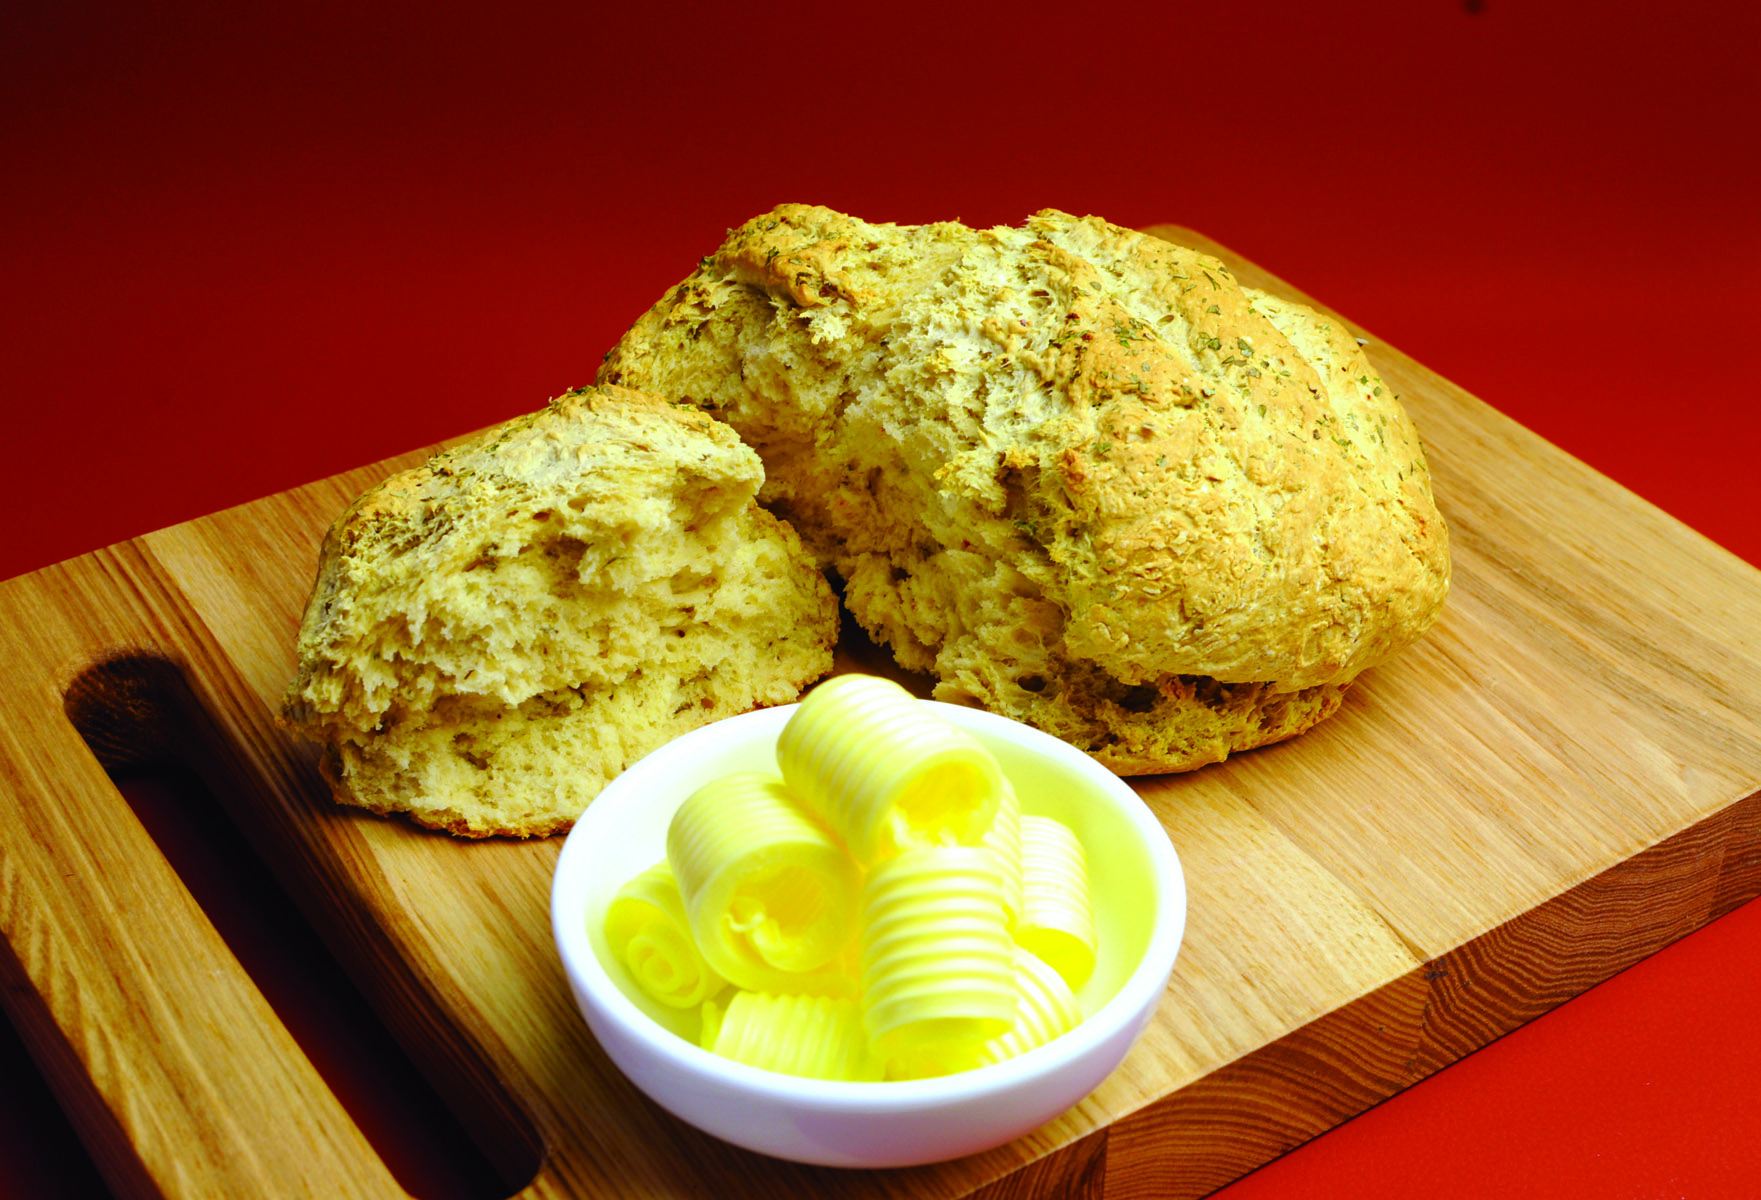
Once mixed, knead the mix into an approximately round shape using a surface dusted in flour. Grab your camp oven and smear butter over its sides, such that when you bake the damper it won’t stick. Place the damper in, criss-crossing the top with a knife for that classic pull-apart appearance. Put on the lid and place the oven in the coals of the fire (not into the depths of the inferno itself). Using your shovel, scoop some coals onto the top of the lid so that the damper cooks evenly and has a crisp top.
Expect your damper to be ready in 20 to 30 minutes. To check if its done, poke a metal skewer deep into it and see whether it comes back clean (in which case it’s ready) or covered in mix (in which case the damper needs longer). Others say that you can check if its done by giving it a knock and seeing if it sounds hollow.
Eating hot damper will be taste enough for many, but you can add extra flavour using pastes and spreads applied after cooking. To go full-blown Australian (to invert Robert Downey Junior’s phrase from Tropic Thunder, “always go full Australian”) scrape on some Vegemite and butter, or if you’re a sweet tooth, how can you look past locally produced honey?
Alternatively you can incorporate some flavours into the damper itself, by adding ingredients during the mixing stage. You can consider adding bacon chunks and herbs, or alternatively, raisins, dried apricots and golden syrup. The possibilities are endless.